Learning how to clean an isopod enclosure starts with a surprising distinction: some of the mess is dinner. Decaying leaves and wood belong in the habitat. Routine upkeep means removing spoiled supplemental food, replenishing material the colony consumes, and checking moisture. Renew worn-out substrate when its condition calls for it, while protecting the animals hidden inside.
Think of the enclosure as a small forest floor with residents. A disappearing leaf is often a sign that the residents are doing their job. A forgotten vegetable scrap is a different housekeeping problem. Knowing which is which saves you from turning every tidy-up into moving day.
Start With a Small Spot Clean
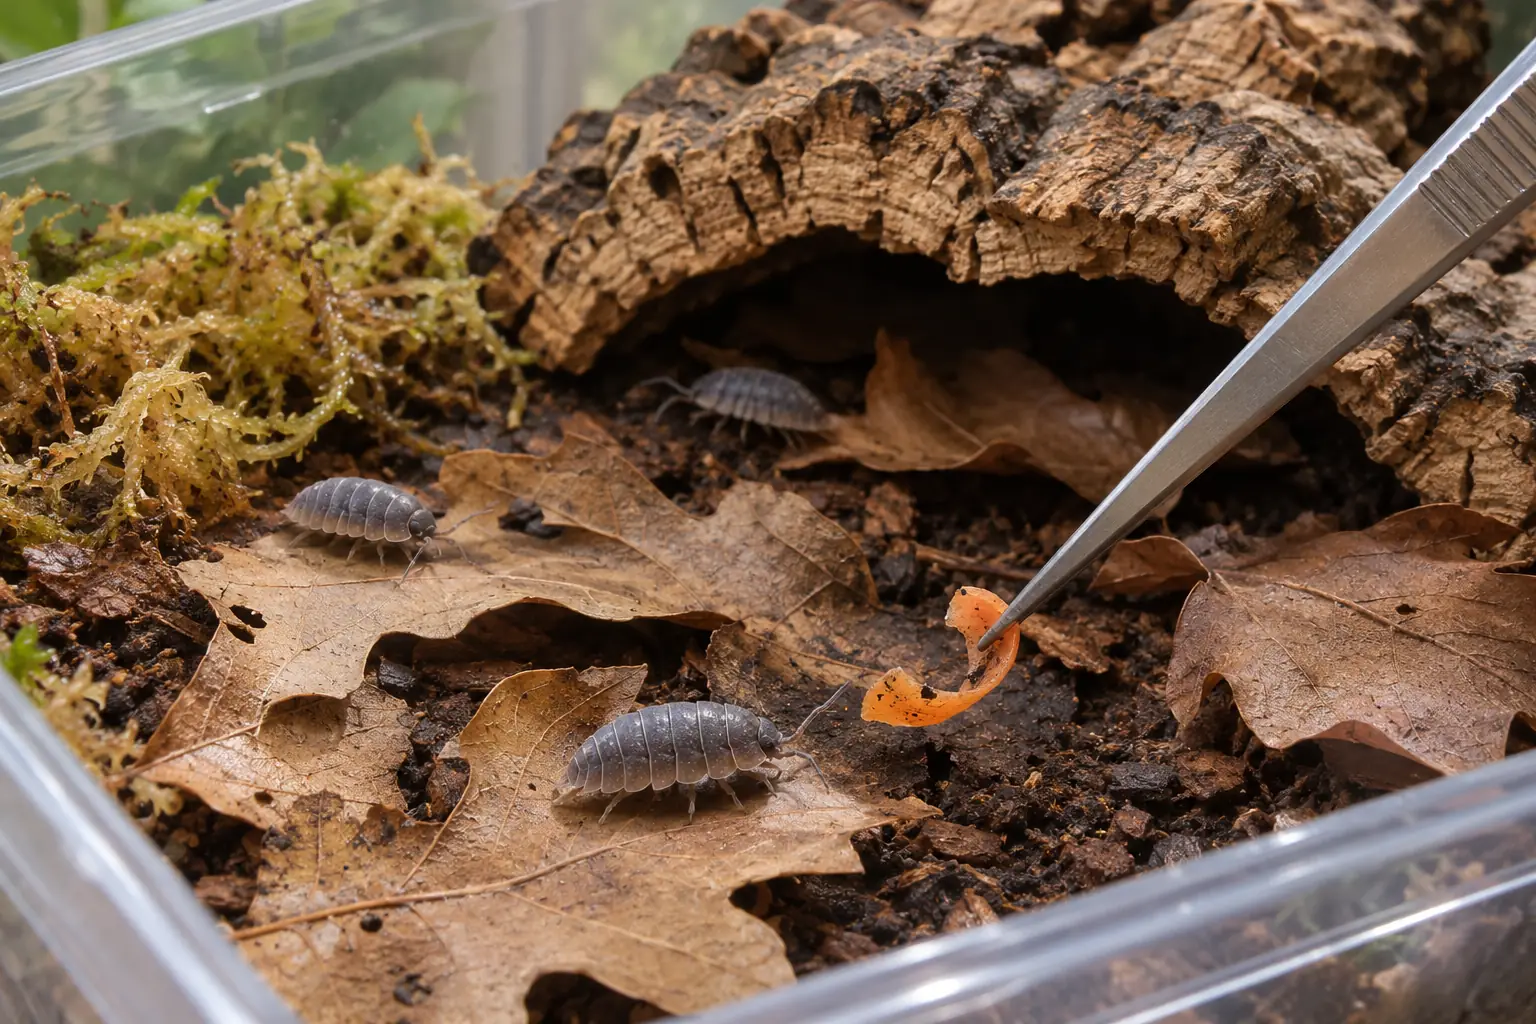
During normal feeding and moisture checks, look at the places where you last offered extra food. Portland Insectarium recommends removing leftover fruit and vegetables after a couple of days, and removing them when moldy. Check sooner if a food spoils quickly in your enclosure; that timing is not permission to leave a visibly spoiled piece.
- Lift out spoiled supplemental food. Inspect underneath it for isopods before removal, and take away any loose remnants of that food nearby. Tweezers can help you reach the scrap without digging up the enclosure.
- Replenish leaves as they are eaten. Keep suitable decaying leaves and wood available; their gradual breakdown is part of the habitat, not a reason to sweep the floor bare.
- Check before adding water. Feel the substrate in the damp refuge and check the drier area too. Restore moisture where needed without soaking the whole enclosure, and make sure existing vents remain clear.
Our guide to how isopods and springtails live together explains their different roles. Adding springtails does not remove your job as keeper. Continue checking food and moisture rather than waiting for the cleanup crew to solve every problem.
What Is Isopod Frass?
Isopod frass is their waste: tiny droppings that can blend into the substrate. Smug Bug describes the pellets as small, brown, and often roughly square. You do not need to hunt down every one. A little waste in an active colony is expected.
The concern is buildup as the animals consume their surroundings. Look for a substantial change in the substrate, rather than declaring the enclosure dirty because you spotted one dropping.
How Often Should You Change Isopod Substrate?
There is no single replacement calendar for every colony. Aquarimax gives a four-to-six-month interval in its general care guide, while Portland Insectarium says a setup may go a year or more unless the population grows rapidly. Smug Bug also describes different needs for small cultures and crowded breeding tubs.
Those are keeper recommendations, not one agreed deadline. Your species, population, container, and substrate all matter. Use the interval from a supplier familiar with your animals as a reminder to inspect conditions, not an instruction to empty a healthy enclosure on a particular date.
Ask what actually needs replacing. Missing leaf cover calls for more leaves. A shrinking supply of usable substrate calls for replenishment or renewal. Material heavily converted to waste calls for closer attention than a few surface pellets. A note or occasional photo from routine care can help you notice those changes.
Refresh One Area Without Evicting Everyone
For an otherwise healthy colony, partial renewal lets you replace used material while leaving part of the habitat undisturbed. Prepare suitable fresh substrate first, with moisture appropriate for the species. Have a spare secure, ventilated container ready for anything you need to inspect outside the enclosure.
Work through one manageable area. Lift its leaf cover or hide carefully, keeping attached animals safely supported. Inspect small amounts of the old material before removing them. Keep unsorted material contained: it may still hold residents. Do not scoop out a whole corner and assume the animals will have escaped your spoon.
Add fresh substrate to the cleared space, then return displaced animals and cover. Avoid pouring a deep layer over animals already on the surface. Keep a damp refuge available throughout the job. Partial renewal means replacing some old material; endlessly piling new substrate over the old eventually fills the container.
Protect the Babies You Can Barely See
A sieve that catches adults may let young isopods pass straight through. Smug Bug identifies this as a problem with sifting frass. For a small pet colony, slow inspection is more useful than treating a sieve as an animal-proof filter.
Spread a small amount of material thinly in a shallow tray under good light. Look for movement, including beneath leaf fragments. Use a soft fine brush to guide tiny animals gently, or move the piece they are standing on. Work in small batches and return them promptly to suitable moist cover.
Carolina Biological Supply advises damp soil or a damp paper towel during brief observation and a quick return to the habitat. Keep that same moisture need in mind during maintenance. A bright work area helps you see babies; a hot lamp and a long spell on a dry tray do not help them.
If the Enclosure Smells, Find the Source
A new strong sour or rotten smell deserves investigation. Start with a practical inspection: look for forgotten food, check for soaked substrate, and check that ventilation has not become obstructed. Remove an obvious spoiled food item and reassess. A smell alone cannot identify a chemical or tell you its concentration.
If the odor persists or seems to come from the substrate throughout the enclosure, ask a knowledgeable keeper or the supplier to help assess the conditions. Report what you changed, how wet the material is, and whether animals are dying. Do not cover the smell with fragrance or spray household cleaner into an occupied habitat.
When the Colony Needs a Bigger Move
Widespread exhausted substrate, suspected contamination, or a colony that has outgrown its space may call for a more substantial move. Have the receiving habitat ready before collecting residents. A move for routine renewal differs from a contamination problem: do not carry suspect material into a fresh enclosure simply to save time. Get advice about the specific contaminant.
Keep removed substrate, leaves, and food scraps contained until you have checked them for animals and settled how to dispose of them. Do not dump used colony material into the garden or outdoor compost, where hidden young could be released. In the United States, check applicable permit conditions and ask USDA APHIS or your state agriculture department about disposal requirements.
APHIS notes that many isopod species require permits. A generic online freezing or heating tip is not a substitute for the instructions that apply to your animals and material. Keep any animals you are still recovering in suitable ventilated housing while you arrange the next step.
The most useful result is a habitat that still works for its inhabitants: food available, moisture maintained, space to shelter, and spoiled extras removed. A few well-chosen maintenance jobs can accomplish more than an impressive-looking empty box.
Until next time.

Browse more guides in our Isopods category.
Sources and Further Reading
- Portland Insectarium — Isopod Care
- Aquarimax Pets — Isopod Care
- Smug Bug — Changing Isopod Substrate
- Carolina Biological Supply — Care Guide: Terrestrial Isopods
- USDA APHIS — Invertebrate Pets