
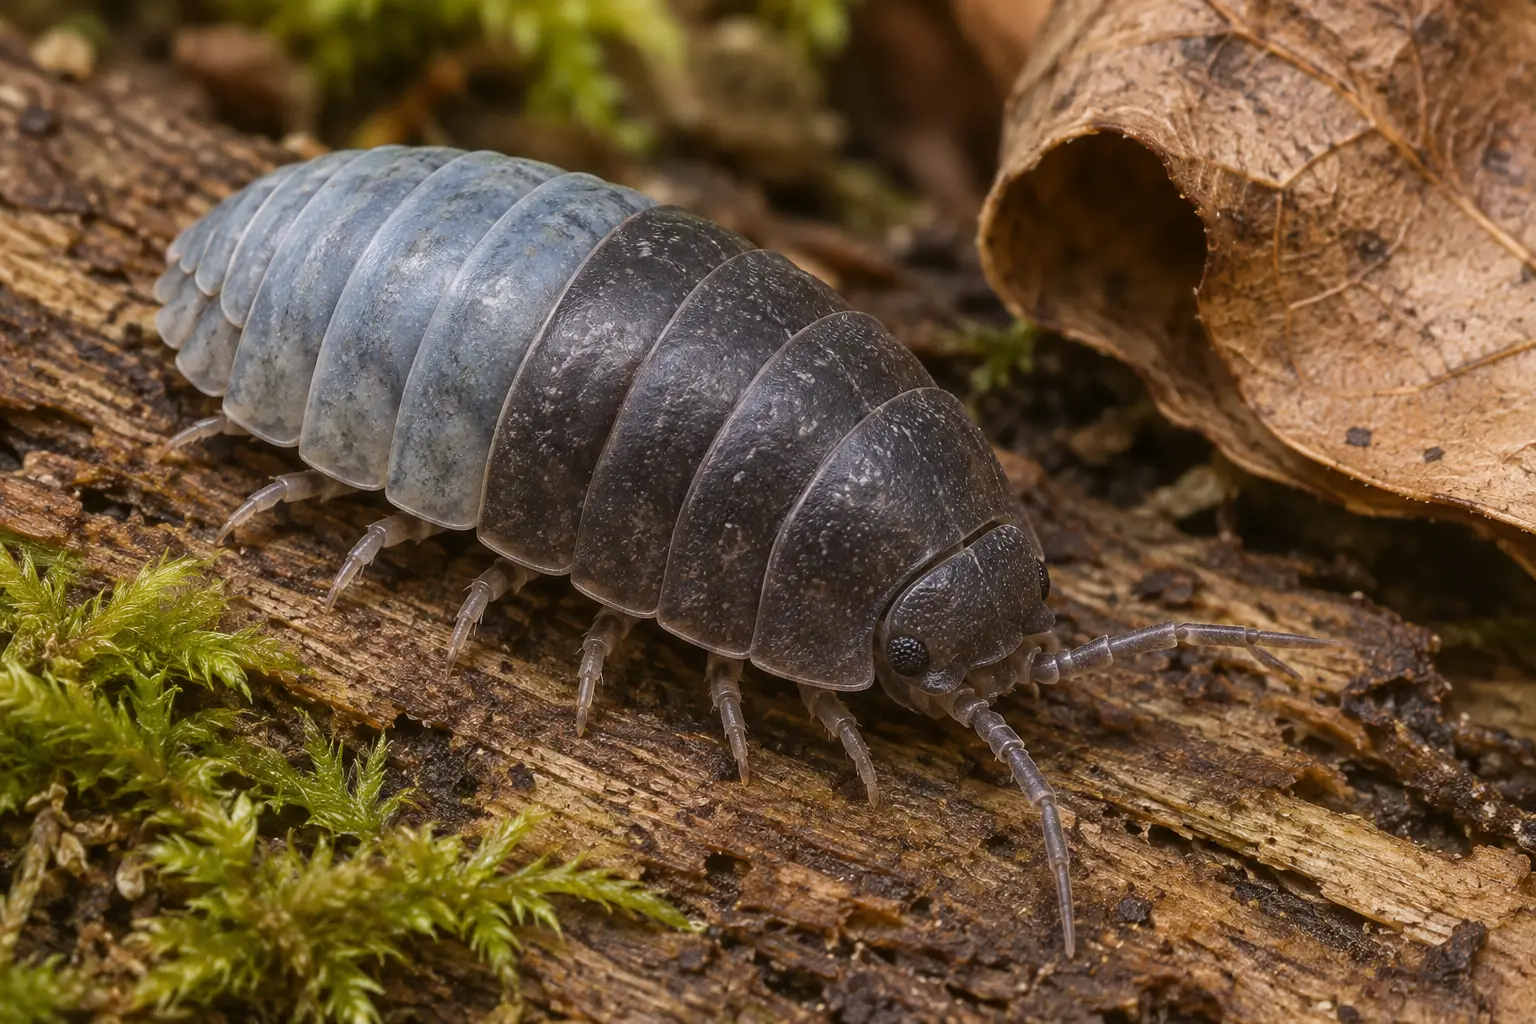
Isopod molting happens in two stages: the animal sheds the rear half of its outer skeleton first, then the front half. A temporary difference between the two halves can be normal. It does not automatically mean your isopod is stuck or injured.
Finding what looks like half an empty isopod can still make a new keeper pause. Before you reach for tweezers, it helps to know what you are looking at. There is a surprisingly tidy rebuilding job happening under those little plates.
One Shell Change, Two Separate Halves
An isopod’s outer skeleton, or exoskeleton, provides support and protection. Its hardened covering cannot simply stretch as the animal grows. A new covering forms beneath the old one, and the old covering must be shed. The fresh outer layer is initially soft before it hardens.
In terrestrial isopods, the split runs across the body between the fourth and fifth large trunk segments. The rear section comes off first. The front section, including the covering of the head, follows later. Researchers call this a biphasic molt. That just means it happens in two phases.
The pause between those phases is part of the process. A 2018 study by John-David Nako and colleagues describes the front half following about one to two days after the rear. Treat that as useful context, not a countdown that every pet species must obey.
What a Normal Molt Can Look Like
The two halves may look different while they are at different stages. An animal can appear cloudy before shedding, while the newly exposed surface may look brighter afterward. On a normally dark pill bug, the fresh rear section can also look bluish or purplish.
The University of California’s pillbug guide includes a photograph of an adult with bluish rear segments that have not yet hardened. That is a useful reminder: a change in color can accompany normal development. Color alone cannot tell you whether an animal is healthy or identify an illness.
Use these observations as clues, rather than a home diagnostic test:
- Different-looking front and rear halves can reflect the normal two-stage change. Watch for progress without picking the animal up.
- An empty, thin piece with shell plates can be shed covering. A partial shell by itself is not proof that an isopod died.
- You may see only one shed piece, or miss the event entirely. You do not need to find two matching halves to prove that molting occurred.
- Appearance becomes more useful when you know the animal’s usual color and what has changed over time. One quick glance rarely tells the whole story.
How Often Do Isopods Molt?
There is no single schedule for every species and age. Young animals shed as they develop, and terrestrial isopods continue molting through their lives. Reaching adulthood does not mean the shell changes are finished.
For the common young pillbugs and sowbugs it covers, the University of California guide describes molts about every one to two weeks during growth. That is an example for those animals, not a timetable for every colony sold under the name “isopods.”
Species differences can be substantial. In a laboratory study, Miloš Vittori and colleagues found that the cave-dwelling Titanethes albus molted much less frequently than expected for surface-dwelling isopods under similar conditions. A cave specialist is not a model for your beginner colony, but the comparison shows why a universal calendar falls short.
Keep brief notes if you enjoy following development. Record the species, approximate size, date, and what you actually saw. An empty shell somewhere in a busy colony usually cannot tell you which individual shed it.
The Old Shell Is Part of the Recycling Plan
The hidden preparation starts before the old covering comes off. Many terrestrial isopods recover calcium carbonate from the old skeleton and temporarily store it in deposits on the underside of the front body section. After the rear molt, those reserves help harden the new rear covering.
This is one reason the two-part process is more interesting than a simple costume change. The animal is moving building materials around while replacing its protective surface. Research by J. Glötzner and Andreas Ziegler describes that calcium storage and reuse in terrestrial species.
Eating the discarded covering can recover more material. Ulrich Rupp and Andreas Ziegler studied this in Porcellio scaber, finding increased calcium in storage granules in its digestive gland after it ate its shed cuticle. The old shell is not automatically rubbish.
Leave an ordinary shed shell in the enclosure for the colony. That does not mean every species will eat every piece immediately. Vittori’s cave-isopod study, for example, found that the animals did not eat the rear shed after the rear molt. An uneaten piece is not, by itself, evidence of trouble.
Support the Habitat and Give the Animal Space
The most useful preparation is steady everyday care. Keep suitable leaf litter, shelter, and an appropriate calcium source available. Portland Insectarium recommends options such as cuttlebone or calcium carbonate for shell development. Maintain those resources routinely rather than treating a handful of extra supplement as a guaranteed rescue.
Check that the colony still has a damp refuge, along with ventilation and room to move away from wetter areas. Our isopod humidity guide explains how to check moisture in the habitat without chasing one number on a meter. Avoid soaking the whole enclosure because you have spotted a molt.
Water matters during the shell change itself. Nako’s team found that Armadillidium vulgare and Porcellio dilatatus absorbed water vapor under very humid laboratory conditions, helping their bodies expand around molting. Those experimental conditions are not a humidity setting to copy into every pet enclosure.
If you uncover a molting animal, stop the inspection and restore its shelter gently without trapping it. Avoid moving it for a closer photograph or repeatedly lifting the same hide. Specialist keeper Laura Mae Riepl’s care guide emphasizes avoiding stress during a molt. Watching quietly is useful; constant checking is another disturbance.
What If an Isopod Seems Stuck?
First separate a normal pause between the two halves from an apparent problem shedding one of them. Seeing the front covering still present after the rear has come off is not enough to call it a failed molt.
If old covering appears attached while the animal repeatedly struggles, or its condition seems to worsen, record what you can without handling it. A clear photograph, the species name, when you first noticed the problem, and recent care changes are more helpful than simply saying “stuck molt.”
Check whether the damp refuge has dried out or the substrate is waterlogged, then seek advice from a keeper experienced with that species or a veterinarian who works with invertebrates. A photograph may still leave uncertainty about the cause. Do not pull at the covering, force a bath, or apply household treatments. A soft animal is easy to damage.
Repeated losses deserve a wider review of the colony’s conditions. They should not all be labeled molting problems because a shell piece happened to be nearby.
Once you recognize the two-stage pattern, the enclosure becomes easier to read. A pale rear half or an abandoned piece of shell may be a glimpse of ordinary growth. Your best contribution is often a well-kept habitat and the patience to let a tiny rebuilding job continue.
Until next time.

Browse more guides in our Isopods category.
Sources and Further Reading
- Nako, Lee and Wright (2018) — Water Vapor Absorption During Isopod Molting
- Vittori and colleagues (2012) — Molting and Cuticle Deposition in Titanethes albus
- UC Statewide IPM Program — Pillbugs and Sowbugs
- Glötzner and Ziegler (2000) — Calcium-Transporting Cells During Isopod Molting (Abstract)
- Rupp and Ziegler (2019) — Shed-Shell Ingestion and Calcium Storage in Porcellio scaber (Abstract)
- Portland Insectarium — Isopod Care
- Laura Mae Riepl, Smug Bug — Isopods: Basics of Care (PDF)